Monday, October 22, 2012

Three Cheese Mushroom Triangles

In the busyness that is painting a house and moving to Hollywood, I haven't had a chance to post a filo blog! In the past couple of weeks I have experimented with a mushroom and cheese dish, worked on my twist of an Eton Mess . . . which I may call a Hollywood Mess in a Basket (or Handbag) . . . tried to create my own version of spanakopita and made the lemon tarts (again, with different yogurt). I haven't typed up the recipe for the mushroom dish, but I do have pictures that I can share of the making process!

First I sauteed some onions and garlic in a little olive oil. I then added some chopped crimini mushrooms.


 While that was cooking, I whisked together some eggs and grated or crumbled three different cheeses.


Oh and I almost forgot! I found some fresh parsley in the fridge so I chopped a bit of that and added it to the lightly sauteed mushrooms.


Finally I combined all the ingredients, buttered my filo, folded them into little triangles and popped them in the oven.


Here is the finished product . . . in rather golden light for some reason . . .


As always, if you're dying for the recipe, just give me a shout and I'll be happy to get it to you!


Tuesday, October 16, 2012

Black & White Raspberry Bombs (or Bon Bons)

Hello there! Here is the latest filo adventure. I can't make up my mind about the name, but other than that (and some minor filo technical difficulties) these little raspberry and chocolate treats need no tweaking! As simple to make as one-two-three.


One. Take each raspberry and put one white chocolate chip inside and one dark chocolate chip.


Two. Butter three sheets of filo, then cut them into eighths. Place one stuffed berry in the middle and sprinkle with sugar.


Three. Wrap them up in little bundles and pop them in the oven!


. . . and voila! Here they are . . . actually these are the few that stayed together! Suffice it to say, there is a technical difficulty in the presentation department. However, in the eating department they were aces, with not a single one left at the end of the night. 


Also presenting some technical difficulties that evening was the fact that I had not thawed enough filo dough . . . rushing the thawing process is nearly impossible. So, always, always remember to let your dough thaw for at least two hours before attempting to work with it!


Friday, October 12, 2012

Low-fat Lemon Tarts

Yep! You heard me, low fat!! These little lemon tarts were made with fat free yogurt and not too much sugar. I modified a recipe I found on the side of the yogurt carton for ginger tarts, since lemons were on hand and ginger was not, lemon tarts it was!


I took half a cup of sugar and whisked it with one egg, plus one egg yolk, until it was thick . . . next time I may use the electric mixer . . .

In a separate bowl I combined three tablespoons of lemon juice, one cup of vanilla nonfat yogurt and one teaspoon of vanilla. Then I added this yogurt mixture to the eggs and sugar. Once those mixtures were combined I sifted in a third of a cup of flour (I might try reducing this to a fourth of a cup).


I used six sheets of filo. I buttered three sheets and cut them into sixths and did the same again so that I could have more pointy bits around the edges of the tart, but if you're not that fussed you could just butter six sheets together. Putting the filo dough butter side down in a muffin tin, I then brushed the pointy bits with butter too. The recipe made six tarts that each held about half a cup of the mixture. Into the oven at 350F, for what I think was twenty minutes!? . . . and voila! Low-fat Lemon Tarts!


They were very nice warm. Once they were cool I served them with a bit of sour cream (or creme fraiche) and lemon curd mixed together, topped with raspberries (or blueberries would be good too)! The toppings filled in the little divot that appeared after the tarts had cooled and deflated a bit. Surprisingly, I preferred them warm . . . I was sure I would prefer them cool . . .


The recipe is there for you to follow, I just haven't put it into recipe form yet . . . happy to oblige should anyone want the recipe!

Tuesday, October 9, 2012

Chestnut Season

Autumn arrived this week. It wasn't messing around. From 78F to 48F (and lower) in the space of a couple days! This crisp autumnal weather made me think of warm spices, chestnuts falling from the trees and of course, a new dessert!


For this recipe I took roasted chestnuts, golden raisins (or sultanas) and dates. I added a bit of honey, spices - cardamom, cloves and allspice (mmmmm!) and a splash of apple brandy.


After rolling the filling into buttery filo, I sprinkled the top of each fat little cigarillo with spiced sugar and baked them until they were a lovely golden brown.


Served warm with a cup of coffee, they hit the spot for my spicy dessert craving! As always, I'm happy to share the recipe if you drop me a line.

Friday, October 5, 2012

Apple Strudel with Calvados & Cranberries

So I decided that if I didn't share any of my recipes that would be kinda mean. Since I'm pretty happy with how this recipe turned out (and I took loads of pictures) I'm going to share it with you! Ok-ok, so the recipe needs some tweaking. . . my proportions definitely aren't right, but that's not necessarily a bad thing. . . I ended up with enough extra apple filling that I made a two-person crumble! Bonus!


I adapted my recipe from Paula Deen's Strudel Recipe and since I didn't try her's first I can't give you a comparison, but my guinea pigs  tasters didn't complain so I guess my recipe is a keeper (proportional problems aside)! So here's what you'll need for the un-tweaked version.


  • 1/4 cup Calvados (or apple brandy)
  • 1/2 cup dried cranberries
  • 2 Granny Smith apples (or Cox, Bramley, or other tart baking apple)
  • 1 Fuji apple (or Braeburn, Pink Lady, or other sweet eating apple)
  • Zest from one lemon
  • Juice from one lemon (divide juice in half)
  • 1/2 tsp cinnamon
  • 1/2 tsp nutmeg
  • 1/4 tsp ginger
  • 1/8 (or dash) of cloves
  • 1/2 cup packed brown sugar
  • 2 Tbsp of salted butter, melted (reserve rest of the stick for brushing the filo)
  • 7 sheets of filo dough
  • 1 Tbsp caster sugar (for sprinkling on top)

Start by putting the cranberries and Calvados in a microwaveable bowl. Microwave on high for 30-45 seconds. The cranberries should soak up all the liquid. Set them aside and start on the apples.

Core, peel and thinly slice the apples. If you have a mandolin slicer this will cut your prep time significantly, if not, slice the apples as thin as possible. The slices of apple should be floppy, not stiff, when you hold one end of the piece. Then in a mixing bowl add all the ingredients in order listed above, ending with the melted butter and the cranberry mixture. Be sure to keep half of the lemon juice aside for the glaze to be added after baking.


Set the filling aside while you prepare your filo. Melt the remaining part of the stick of butter for brushing on the filo dough. I used 7 sheets of filo, but I think it could have used one or two more. I like to keep my filo covered with a piece of cling film and a damp tea towel on top. This keeps the filo from becoming dry and brittle (especially in drier climates). The cling film is a must, as moisture fuses the sheet together. Take one sheet at a time, brush it with butter. Then add a new sheet on top and repeat until all the sheets are used.

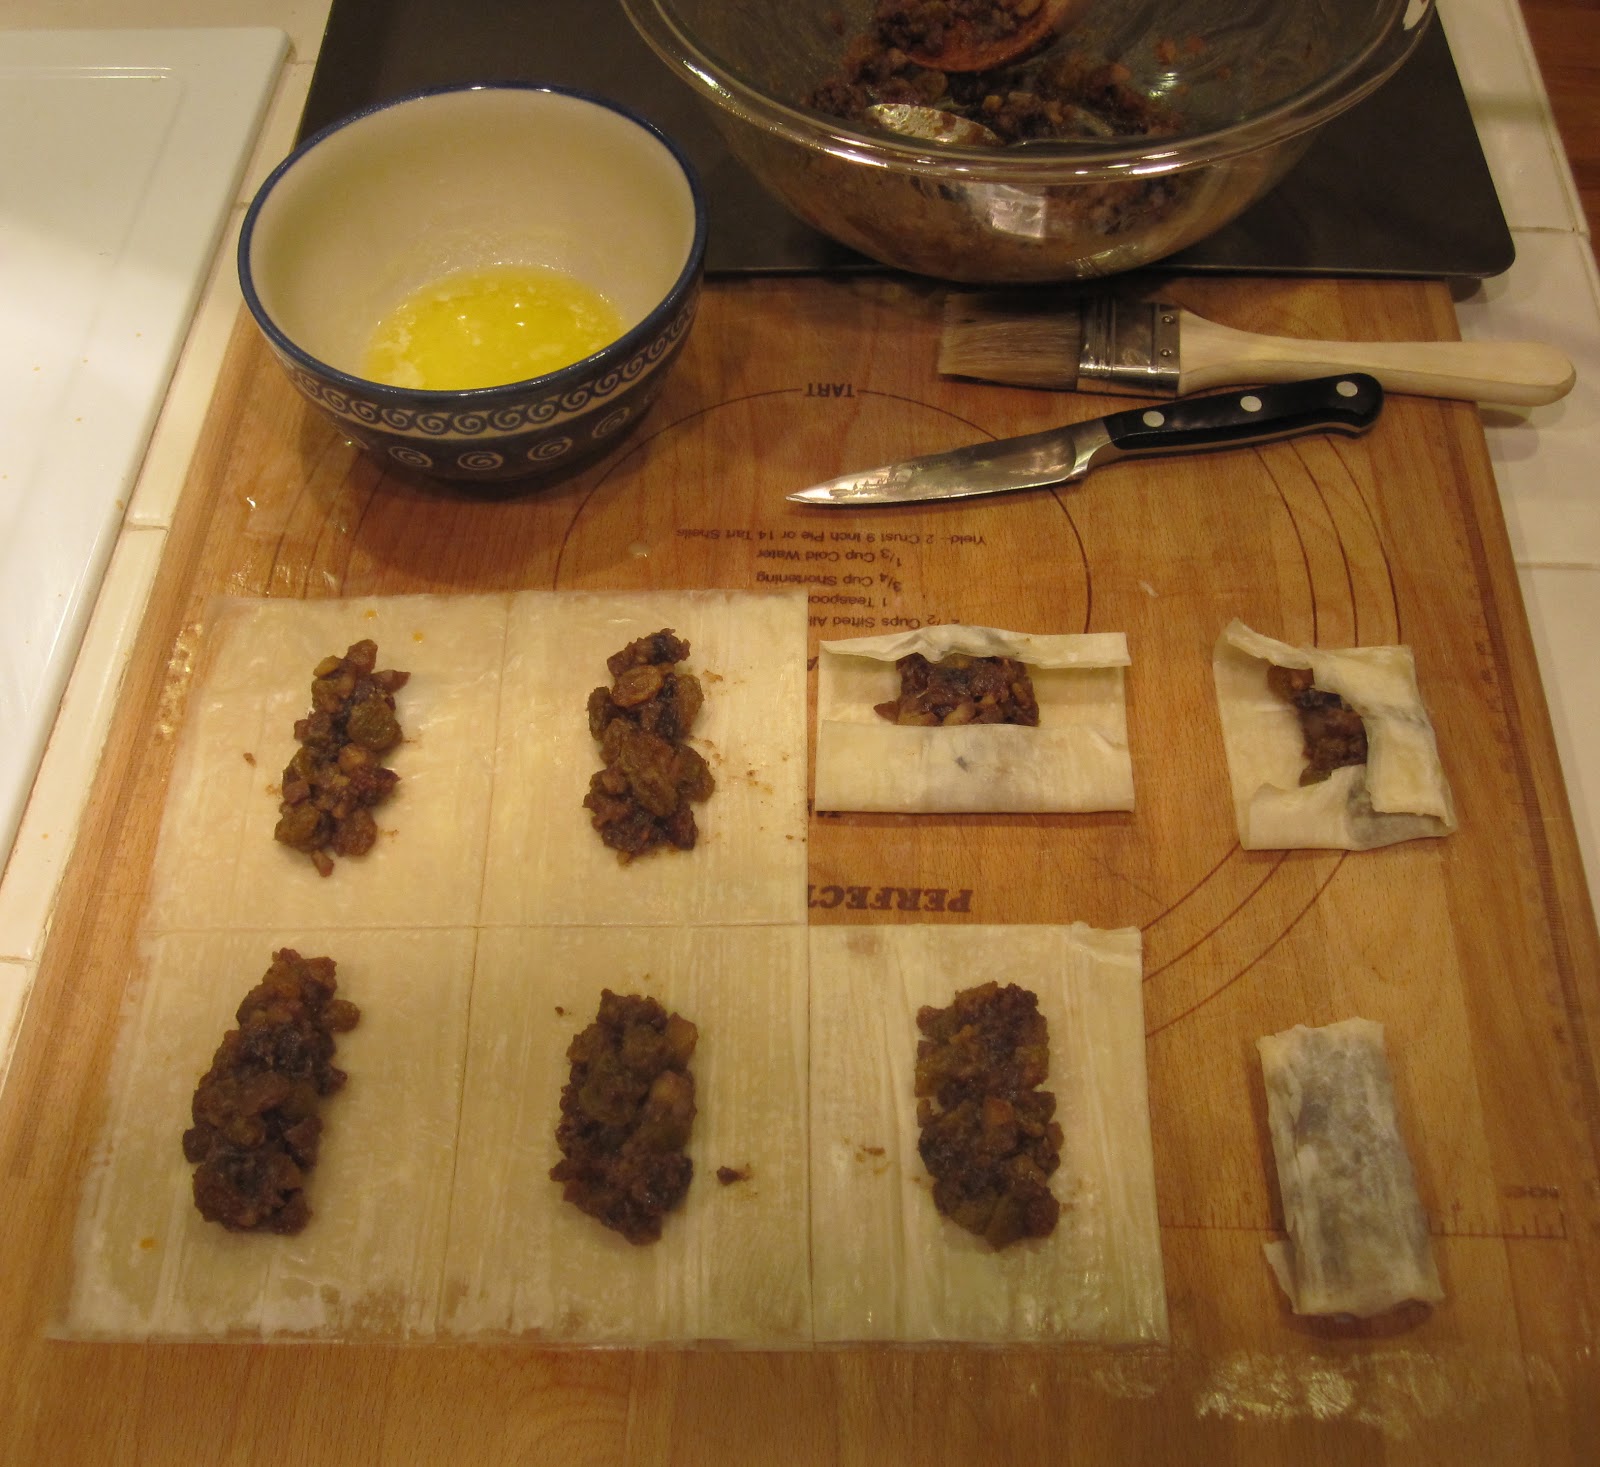
Now the tricky bit, rolling your strudel! See the pictures below to help guide you through. 

First, put the filling in a row in the middle leaving approximately two inches of filo on the ends and three on each side. Fold the ends in first to seal in the juices.

Second, fold over the sides making sure they overlap.

Third, carefully flip the strudel "burrito" over, brush with butter, sprinkle with caster (white) sugar and gently score the top. Then shove it in a 350F oven for half an hour or 'til golden brown.

While the strudel is in the oven you can make a glaze to drizzle on top. For the glaze use

  • Juice from half a lemon (the remaining half from above)
  • 1 cup powdered sugar (slightly more or less depending on the amount of juice)
  • 1 tsp Cavados

Mix all the ingredients until smooth and set aside until the strudel is out of the oven and has cooled a bit.


(Hopefully yours won't leak as much as mine did!) 

After the strudel has cooled a bit, drizzle on the glaze ( and display it on a fancy silver tray that is, of course, just sitting in your cupboard waiting to be used.)


Finally, EAT!!
 It goes nicely with whip cream, ice cream, custard, vanilla sauce or just on its own with a mug of coffee!


Monday, October 1, 2012

The Original

The original would actually be spanakopita, as this was the first thing I made with filo dough. However, since I haven't perfected my own take on spanakopita (yet!) the real original filo experimentation would be the pear and caramelized onion cheesy puffs. Obviously I have not come up with a good name for them yet! (Name suggestions welcome!)

I first created these little puffs for my annual holiday party in Los Angeles. Every year I would go a little nuts, trying out new nibbles for this annual event (earning me the nickname Martha Stewart on Crack!) One year I had some left over sheets of filo dough and wanted to make something with a wintry flavor. So I caramelized some red onion, added it to a small piece of firm ripe pear and hard Italian cheese (such as romano) and wrapped them all together in filo.

The sweetness of the pear and onion is nicely balanced with the saltiness of the melted cheese and butteriness of the pastry. This recipe really came into it's own when I recently made it for my first (and hopefully not last!) dinner party, or rather THE Dinner Party in Hollywood.  I made a simple arugula salad to pair with the puffs and I think they worked together quite well.


 The fillings. 
Caramelized red onion, ripe pear and romano cheese.


 How to fold the butter brushed filo into square parcels, or puffs.


The finished puffs, served with arugula salad.


As a starter I would always server them with the salad. If you're having a cocktail party then the puffs would work best on their own as finger food. I'm not including my recipe here on the blog, as I'm hoping that one day I may put together a recipe book. However, if you'd like to make these at home just drop me a line and I'll be happy to share it with you individually!